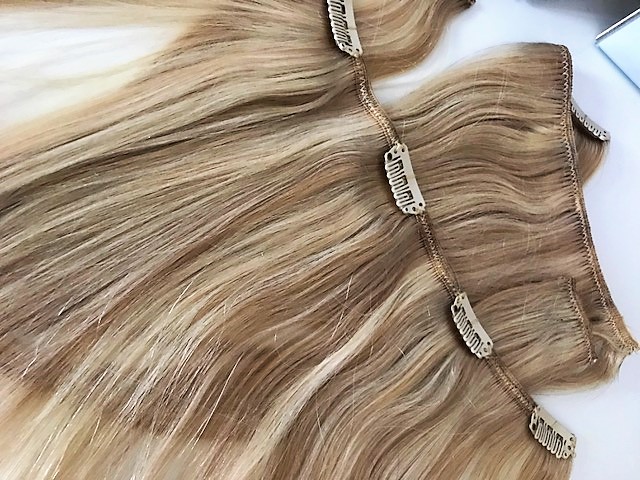
How to Put in Clip In Hair Extensions Like a Pro
Mastering the application of clip-in hair extensions will enable you to transform your look in minutes. This will make the most of the fundamental benefit of clip-ins: the instant boost they can give to volume and length, without the commitment or cost of permanent options.
The great news is that the entire process of putting in clip-ins only needs to take around 10 minutes to 15 minutes, once you get the hang of it.
In this guide, then, we will set out the essential techniques for flawless presentation. Along the way, you will get to know about the essential tools, blending techniques, and common mistakes to avoid.
What You Will Need
Having the right tools will be crucial to your efforts to achieve a smooth application and a seamless finish.
The essential tools include:
- The clip-in extensions themselves, which should be the correct shade and length for the look you desire
- A tail comb for creating clean, precise sections and backcombing
- Sectioning clips (or hair ties) for keeping upper layers of hair out of the way
- A mirror – ideally, both a large wall mirror and a smaller hand mirror for checking the back of your head.
Alongside these, there are some other recommended products and optional extras, including hairspray, dry shampoo or texturizing spray, and a soft-bristle brush.
Step-by-Step Application
So, it’s now time to learn how to put in clip-in hair extensions! Follow these steps, working methodically from the bottom up and securing each weft firmly, to ensure the best results.
- Prepare your hair
Before you begin, brush your natural hair thoroughly to get rid of any tangles.

- Section your hair correctly
Use the tail end of your comb to create a clean, horizontal parting across the back of your head. The first section should run approximately from the bottom of one ear to the other, close to the nape of your neck.
Clip the rest of your hair securely on top of your head, so that it doesn’t get in the way.
- Start from the nape
Open all the clips on your first weft; this will usually be the smallest, two-clip weft. Beginning at the centre of your parting, slide the middle clips down into the teased section, as near to your scalp as possible. Push the clips closed until you hear a secure snap.
Then, proceed to attach the outer clips in the same way. Gently tug the weft to check it is firmly in place.
- Work upward layer by layer
Release a small section of hair from your top clip, roughly an inch or two above the first weft, and create another horizontal parting.
Repeat the clipping process with your next weft size up (which may be, for example, a three-clip or four-clip weft), clipping it just above the previous one.
Keep on with this process, working your way up the back of your head until you get to the crown.
- Secure side pieces
After you have done the back, you will be able to turn your attention to the sides of your head.
Create a horizontal parting just above the ear. Attach a smaller, single-clip or two-clip weft, ensuring the clips face toward your hairline for a natural appearance. Do this again on the other side.
- Blending techniques
Release all your natural hair. The line where your hair meets your extensions may be noticeable; if so, adjusting the positioning of your top wefts may be necessary.
Finally, gently smooth everything together with the soft bristle brush.
Common Mistakes to Avoid
Any rundown of clip-in extensions tips like this one, inevitably needs to address some of the things not to do – such as:
- Placing clips too high. This can leave wefts visible when you move your head or put your hair up.
- Failing to section properly. Messy partings lead to messy application, which can translate to uneven results.
- Using the wrong weft sizes. It is crucial to use wefts that are appropriate for the section size. If you attempt to force a wide weft onto a small section of your head, the outcome will be buckling and an unnatural shape.
- Visible clips and tracks. Clips being noticeable through your hair is a telltale sign that the section of natural hair covering them is probably too thin. You can address this by removing the weft and using a thicker covering layer next time.
Styling After Application
The process of styling clip-in extensions doesn’t have to be overly difficult. Indeed, much of the point of human hair extensions is to give yourself something that can be styled just like your own hair.
- Blending with natural hair: a few loose curls or waves will help marry your natural hair with the extension ends, disguising any hard lines.
- Heat styling safely: you should always use a heat protection spray prior to using heated tools such as straighteners or curling wands.
Conclusion
With practice, the application of clip-in hair extensions will become a quick and straightforward element of your morning routine, giving you the enhanced length and volume that you seek.
By following these steps from proper sectioning to careful blending, you can ensure a flawless, confidence-boosting look on every occasion.



Leave a Reply